
Hello Engineers! Today’s blog is specially written for you all. Why? Because I noticed that the most common questions were: Can we use AAC blocks in our house construction? Can we use them on our construction site as an owner or as a civil engineer? Is it a good choice to use AAC blocks in our building?
So, this blog is specifically for you. It covers the best practices for AAC block work installation, explaining how AAC blocks should be installed, where they should be used, and what precautions to take while working with them. This blog will also provide technical guidelines for civil engineers, with references to IS codes. So, let’s dive in without further delay!
7 Best Practices for AAC block Work Installation.

The AAC block stands for “Autoclave Aerated Concrete block” are lightweight, precast building materials revolutionizing modern construction. In the past few decades, the use of AAC blocks has significantly increased in the construction industry. If you are also using these blocks for building your house or any other construction project, it is essential to have a good understanding of them. Also read, AAC Blocks: A Comprehensive Guide to Benefits, and Sizes.
The Slump Test of Concrete for workability of concrete : A practical Procedures.
Why do we use PCC (plain cement concrete) in construction? 7 tips to know.
How to calculate the concrete quantity for the footing?
First, let’s talk about proper checking of AAC blocks.
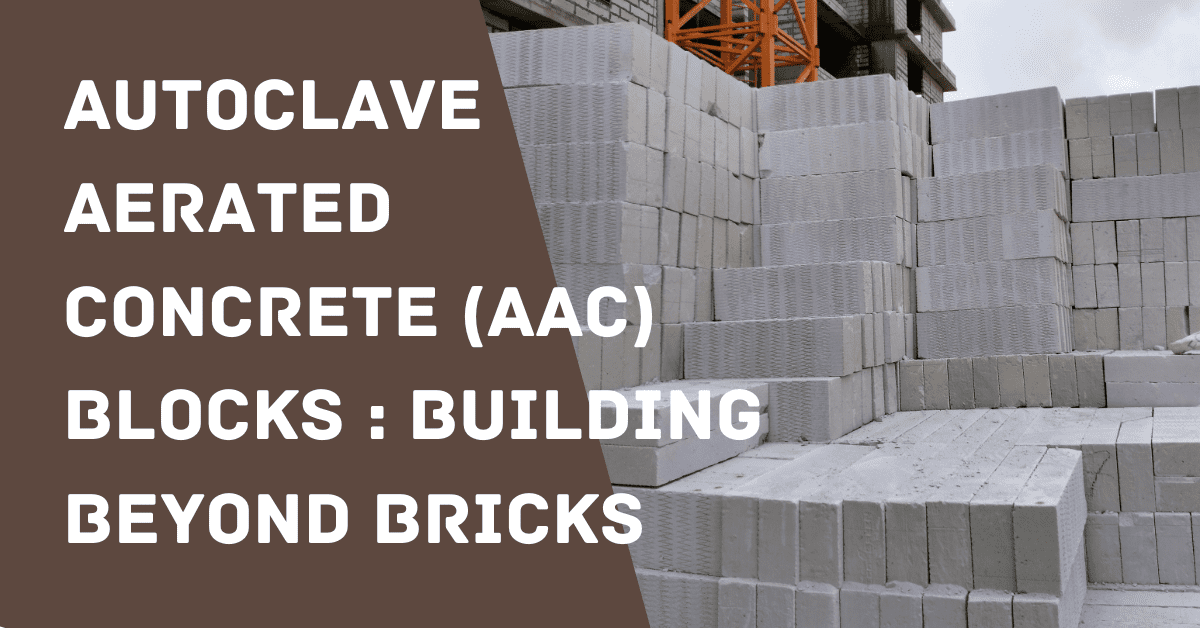
When AAC blocks are delivered to the construction site, they should be stored properly and in an organized manner. As you can see in the image, the blocks are neatly stacked to prevent any damage. If the masons do not stack them properly, they might get damaged.
Now, let’s discuss the strength of AAC blocks. The compressive strength of blocks is 3.5 N/mm², whereas the traditional red bricks have a strength of 7.5 N/mm². You can clearly see that there is almost a 50% difference in strength. I am emphasizing this because if you are prioritizing strength, then red bricks are stronger with 7.5 N/mm², whereas AAC blocks have a lower strength of 3.5 N/mm².
However, AAC blocks have their own advantages :
1. Lightweight: The blocks are made of foam concrete, making them much lighter than red bricks.
2. Larger Size: They are available in larger sizes, which reduces the number of joints.
3. Air Voids: They have air voids within them, making them more soundproof compared to red bricks.
So, keep these points in mind while selecting the right material for your project!
Storage of AAC Blocks :
The second important point is storing the AAC blocks properly :

- As shown in the image, wooden planks are used to keep the blocks off the ground. This prevents moisture absorption from the ground.
- Ensure that the blocks are kept at least 500 mm away from the walls. This helps in maintaining proper air circulation and prevents contact with moisture.
- Use protective sheets to shield the blocks from rain and direct sunlight. This prevents the blocks from getting wet and maintains their structural integrity.
These guidelines are referenced in IS Code 3495 (Part 1, 2, and 4), which specifies the proper storage methods for AAC blocks.

Avoid Using Hammer and Chisel to Cut AAC Blocks
Moving forward, let’s understand why you should avoid using hammers and chisels to cut AAC blocks.
Why Avoid Hammer and Chisel?
- Blocks contain air voids to make them lightweight. Unlike traditional concrete, which requires the removal of voids to increase strength, the blocks are intentionally designed with voids.
- These voids reduce the block’s strength, making it more prone to cracking if struck with a hammer.
- Using a hammer or chisel can easily generate cracks and compromise the block’s integrity.
What to Use Instead?
- Always use a hex saw blade or a machine cutter to cut the blocks.
- Machine cutting ensures a clean and precise cut without causing cracks or damaging the block structure.
Maintain Adhesive Thickness for AAC Blocks :
In traditional brickwork, we typically use a 10 mm thick mortar layer to bond the bricks. However, when working with AAC blocks, it is recommended to maintain a maximum adhesive thickness of 3 mm for proper bonding.
Here are some important points to consider:
- It is highly recommended to use a polymer-based adhesive for blocks. This not only enhances the bonding strength but also improves the tensile properties of the joint.
- The adhesive sets faster, reducing construction time.
- Unlike traditional cement mortar, the adhesive and AAC blocks do not require curing, saving water and labor.
- Maintaining the 3 mm thickness helps prevent cracks, as thicker layers can lead to shrinkage and potential cracking.
Providing concrete stub column and Sill band:
This point emphasizes that when installing blocks, it is recommended to limit the installation to a maximum of six layers per day. This typically achieves a height of approximately 1.2 meters.
 The reason for this limit is to prevent excessive vertical pressure, allowing the adhesive to set properly without undue stress. By restricting the number of layers to six, the adhesive can bond effectively, reducing the chances of cracks or misalignment.
After reaching the 1.2-meter height, it is necessary to provide a concrete band, also known as a seal band, above the block layers. This concrete band should be reinforced with 8 mm rods to enhance structural stability. Now, if the wall length exceeds 4.5 meters, it is recommended to install a stub column at intervals to provide additional support and prevent cracking.
Furthermore, for every 1.2-meter vertical height, a concrete band or runner with reinforcement should be provided. This ensures that the wall remains stable and minimizes the risk of cracks, especially in areas with significant length and height.


Let’s move forward to the next point, which is Internal Plastering.
This is a common question: What type of plaster should we use after constructing a wall with AAC blocks? Should we go for the traditional cement plaster or opt for gypsum plaster for internal surfaces?
Today, you’ll get the answer. I recommend using gypsum plaster for internal plastering, especially for the interior walls of the house. Why? Here are the reasons:
- Since blocks already provide a smooth, finished look, they do not require a thick plaster layer. Gypsum plaster is perfect in such cases.
- Gypsum plaster is known for its lightweight nature and provides a fine, smooth finish.
- The density of gypsum plaster ranges from 700 to 900 kg/m³, making it suitable for AAC block walls, whose density ranges from 500 to 650 kg/m³. This similarity in density helps in reducing dead load and preventing cracks.
- Since both blocks and gypsum plaster have similar densities, they expand and contract simultaneously, reducing the risk of cracks.
- Gypsum plaster dries quickly and has lower shrinkage compared to cement plaster.
External Plastering:
For external plaster, use cement plaster only, not gypsum. Gypsum tends to absorb moisture, causing it to swell and lose its bond with the blocks. This can lead to voids forming and unsightly cracks appearing on the surface, compromising the plaster’s appearance and strength.
Ensure that the plaster thickness does not exceed 15 mm. Ideally, try to keep it under 15 mm. If you can keep it at 12 mm, that’s even better. Why keep the thickness minimal? The thicker the plaster, the more load it will add, increasing the chances of it peeling off.
Unlike traditional red bricks, which are uneven and require a thicker plaster layer, blocks have a smooth and modular surface, reducing the need for a thick plaster layer.
Recommended Plaster Thickness:
- Apply plaster within the range of 10 to 15 mm.
- 12 mm is optimal, as it reduces the potential for cracking and enhances durability.
This guideline is based on IS 1661: 1972, which specifies the plaster thickness for AAC blocks to maintain structural integrity and reduce the chances of cracking.
Alright, so let’s move on to the next point.
Install Wire Mesh at Concrete and Conduit Junctions :
You need to keep in mind that wherever there are junctions, you must provide wire mesh. As you might have seen, after our AAC blocks, if any concrete work is coming up, such as a column or beam, you must provide wire mesh at those points.
After cutting, during the plastering stage, you must use the wire mesh. This helps to control cracks caused by differential movements.
Proper Lintel Placement :
No one is paying attention to this, but the biggest mistake happening in block construction is due to improper lintel placement.

What is a concrete lintel beam in house?
- Ensure the lintel is flush with the top edges of the block course.
- This promotes uniform load distribution and minimizes stress cracks.
- A common mistake is that the blocks are not extended to the end of the lintel.
Instead, the lintel ends somewhere in the middle. Now, if the lintel ends exactly where the block ends, that’s the correct practice. But if the block is placed in the middle and the lintel also ends in the middle, then when the load is applied, the block will crack right from the middle.
So, you need to ensure that the lintel is provided properly in this manner while working with AAC blocks.
Proper Compaction of Foundation Filling:
You need to be cautious about proper compaction, whether it’s red brickwork or AAC blocks.
But why should you pay more attention to it in AAC blocks?
Because even a slight displacement or settlement will cause all the AAC blocks to crack. Earlier, we discussed that the problem with lintel placement was also due to slight uneven settling, causing cracks.
The same issue can occur here as well. So, ensure that you do proper compaction using mechanical equipment, layer by layer. You can’t just dump all the material at once and compact it.
You must compact each layer separately to achieve proper compaction. This prevents future settlement and structural issues, these are all the essential points you need to keep in mind when working with AAC blocks. I hope this explanation was clear and helpful.
This blog is specifically for you to understand how to properly execute AAC block work. I’ve covered every point — what to use, what not to use, when to use adhesive, when to use gypsum plaster, when to use cement plaster, and when to use mortar.
Follow us :- Pinterest Facebook
Also read,
What is a role of a PMC civil engineer in construction?
Why You Should Visit an RMC Plant & Key Considerations for Concrete Sample and Testing.
Comprehensive Guide to the Types of Foundations in Construction.
Some really interesting information, well written and loosely user genial.